Creating pages
After bootstrapping both your frontend application (Nuxt or Next) and your Contentful space, you can start creating your dynamic CMS pages.
Before following this guide, make sure you've followed the guide on creating components. You're going to use the component created there.
We also suggest you read the Bloomreach Content documentation on creating pages.
Creating a new project
To create a new page in Bloomreach Content, you first have to create a new project. Navigate to the Projects application and click the blue + Project button.
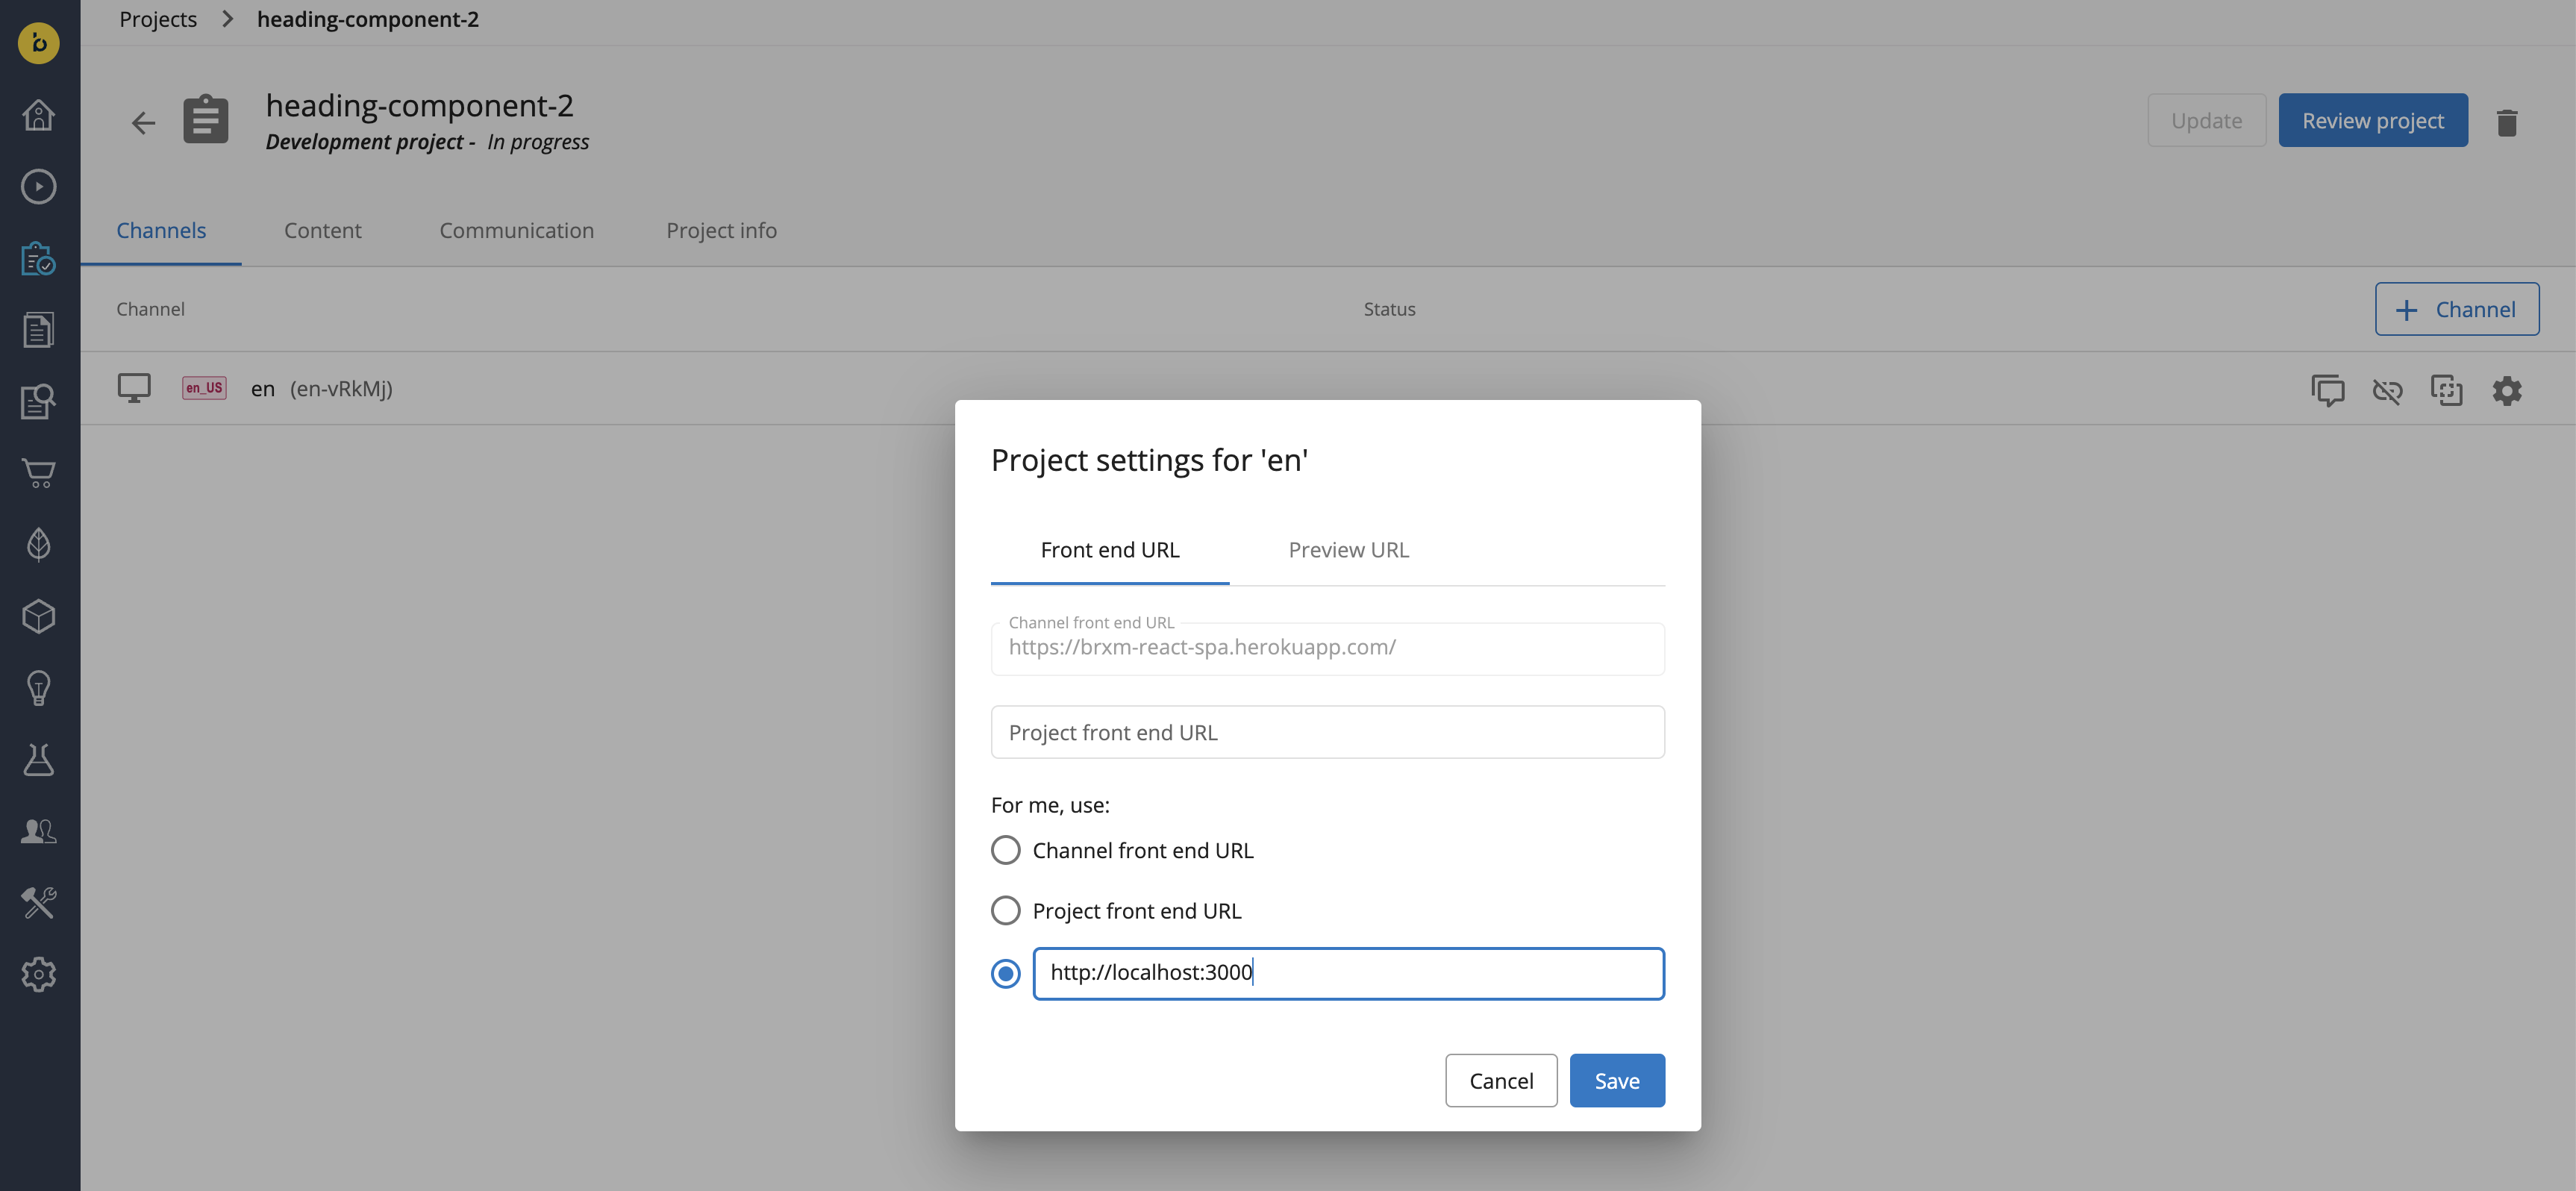
Once the project had been created, add a channel to it (e.g. en) and click on the cog icon to set the preview URL for the channel. Hit Save to confirm.
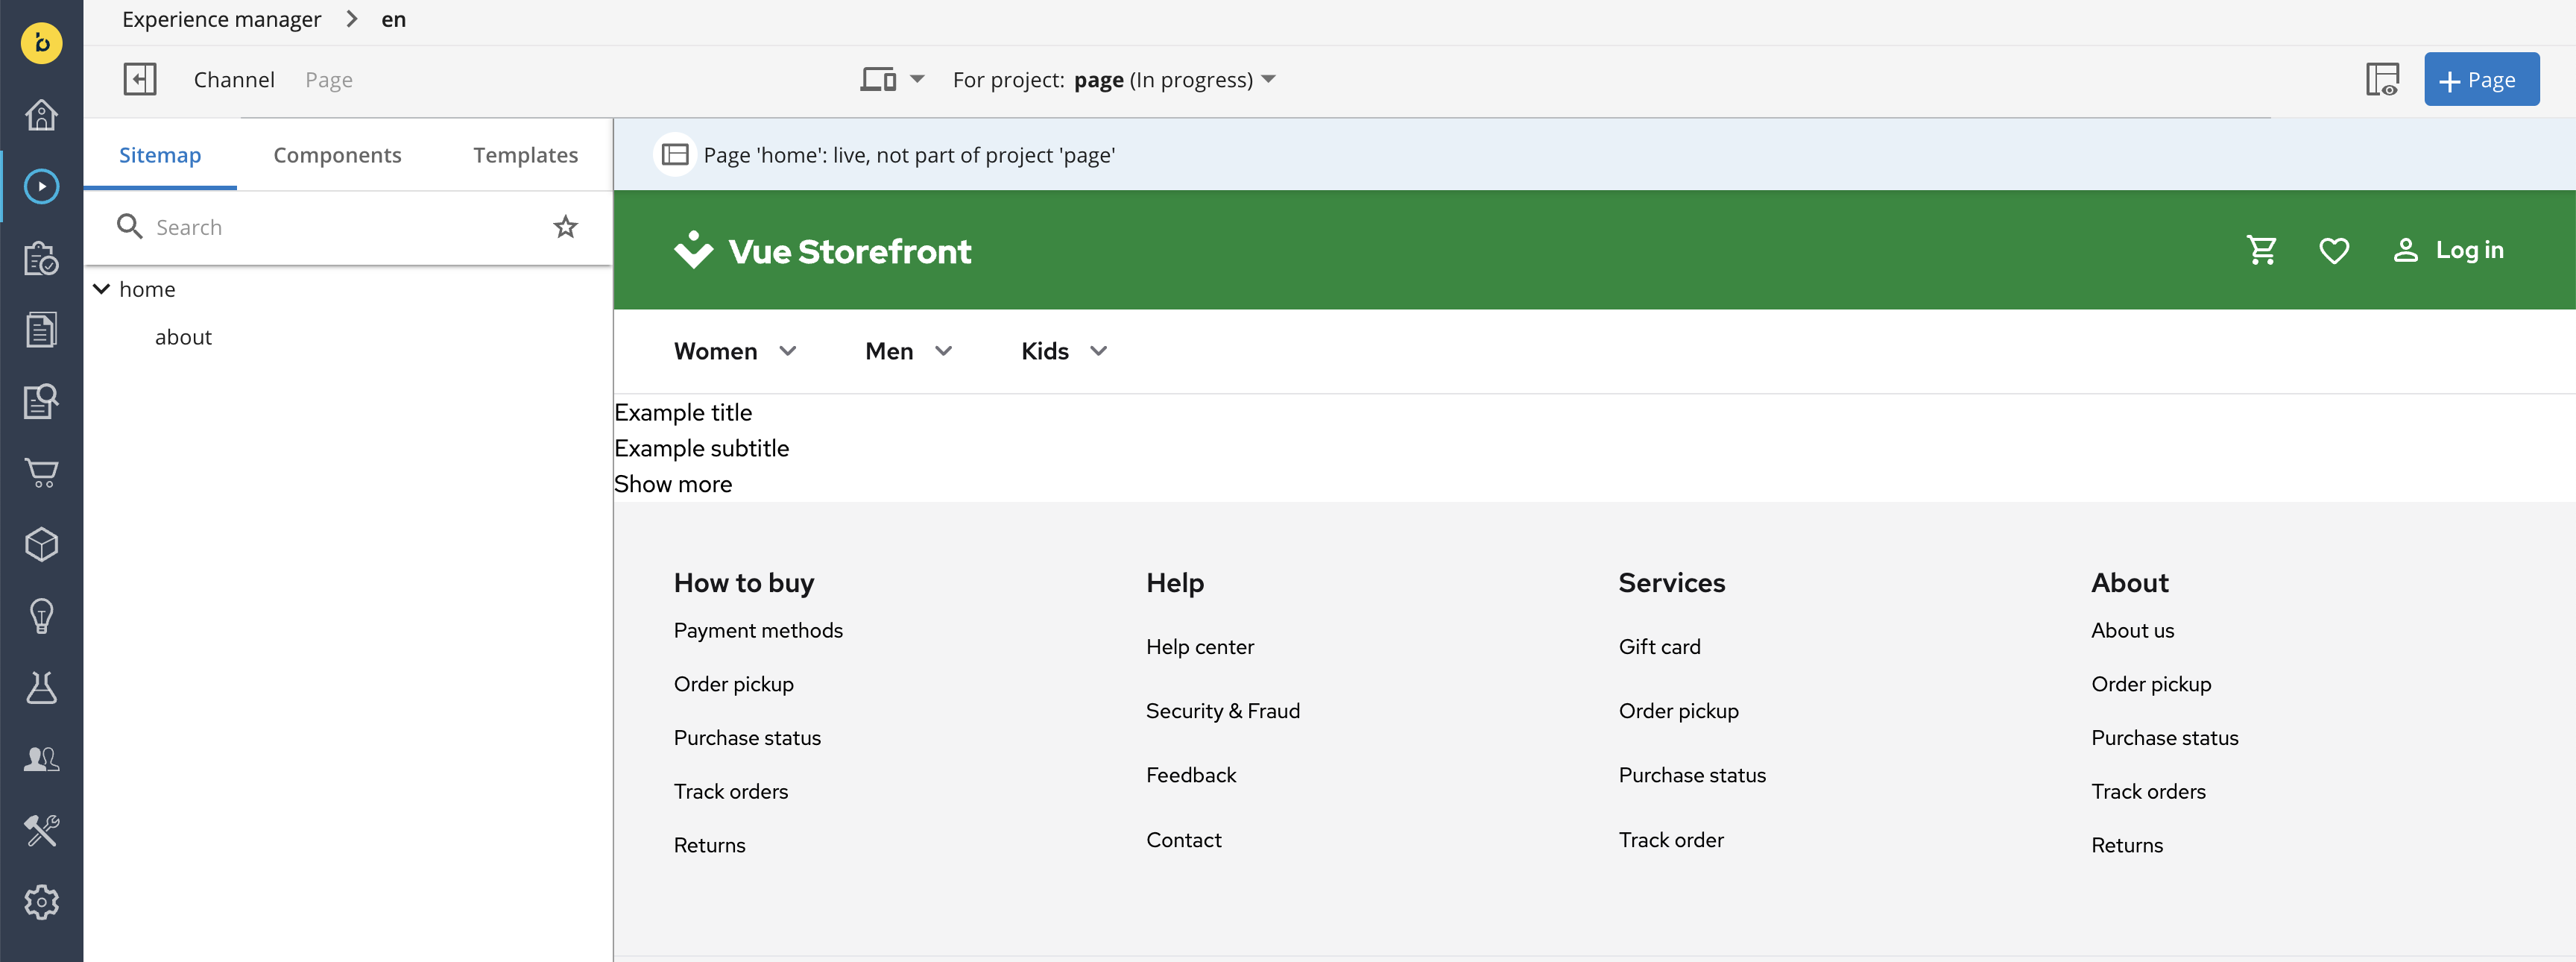
Creating a new page
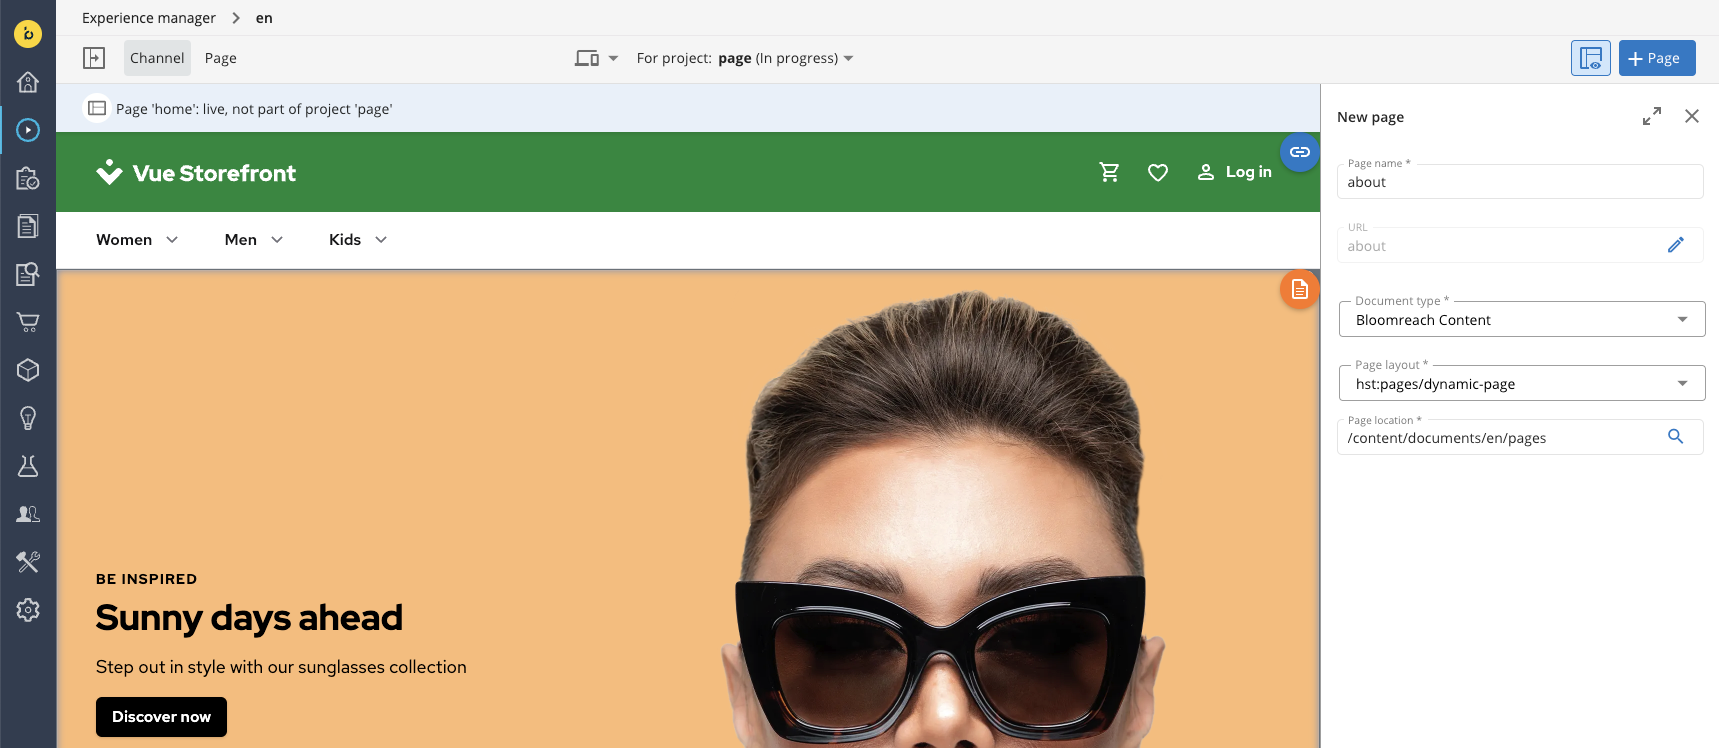
Next, go to the Experience Manager. Make sure you're previewing your newly-created project and the component outlines are active (you can toggle them using the button next to the + Page one).

Next, click the blue + Page button. Give your page a name (e.g. about), set its document type (Bloomreach Content) and layout (hst:pages/dynamic-page). Leave the rest (including the auto-generated URL) as-is.
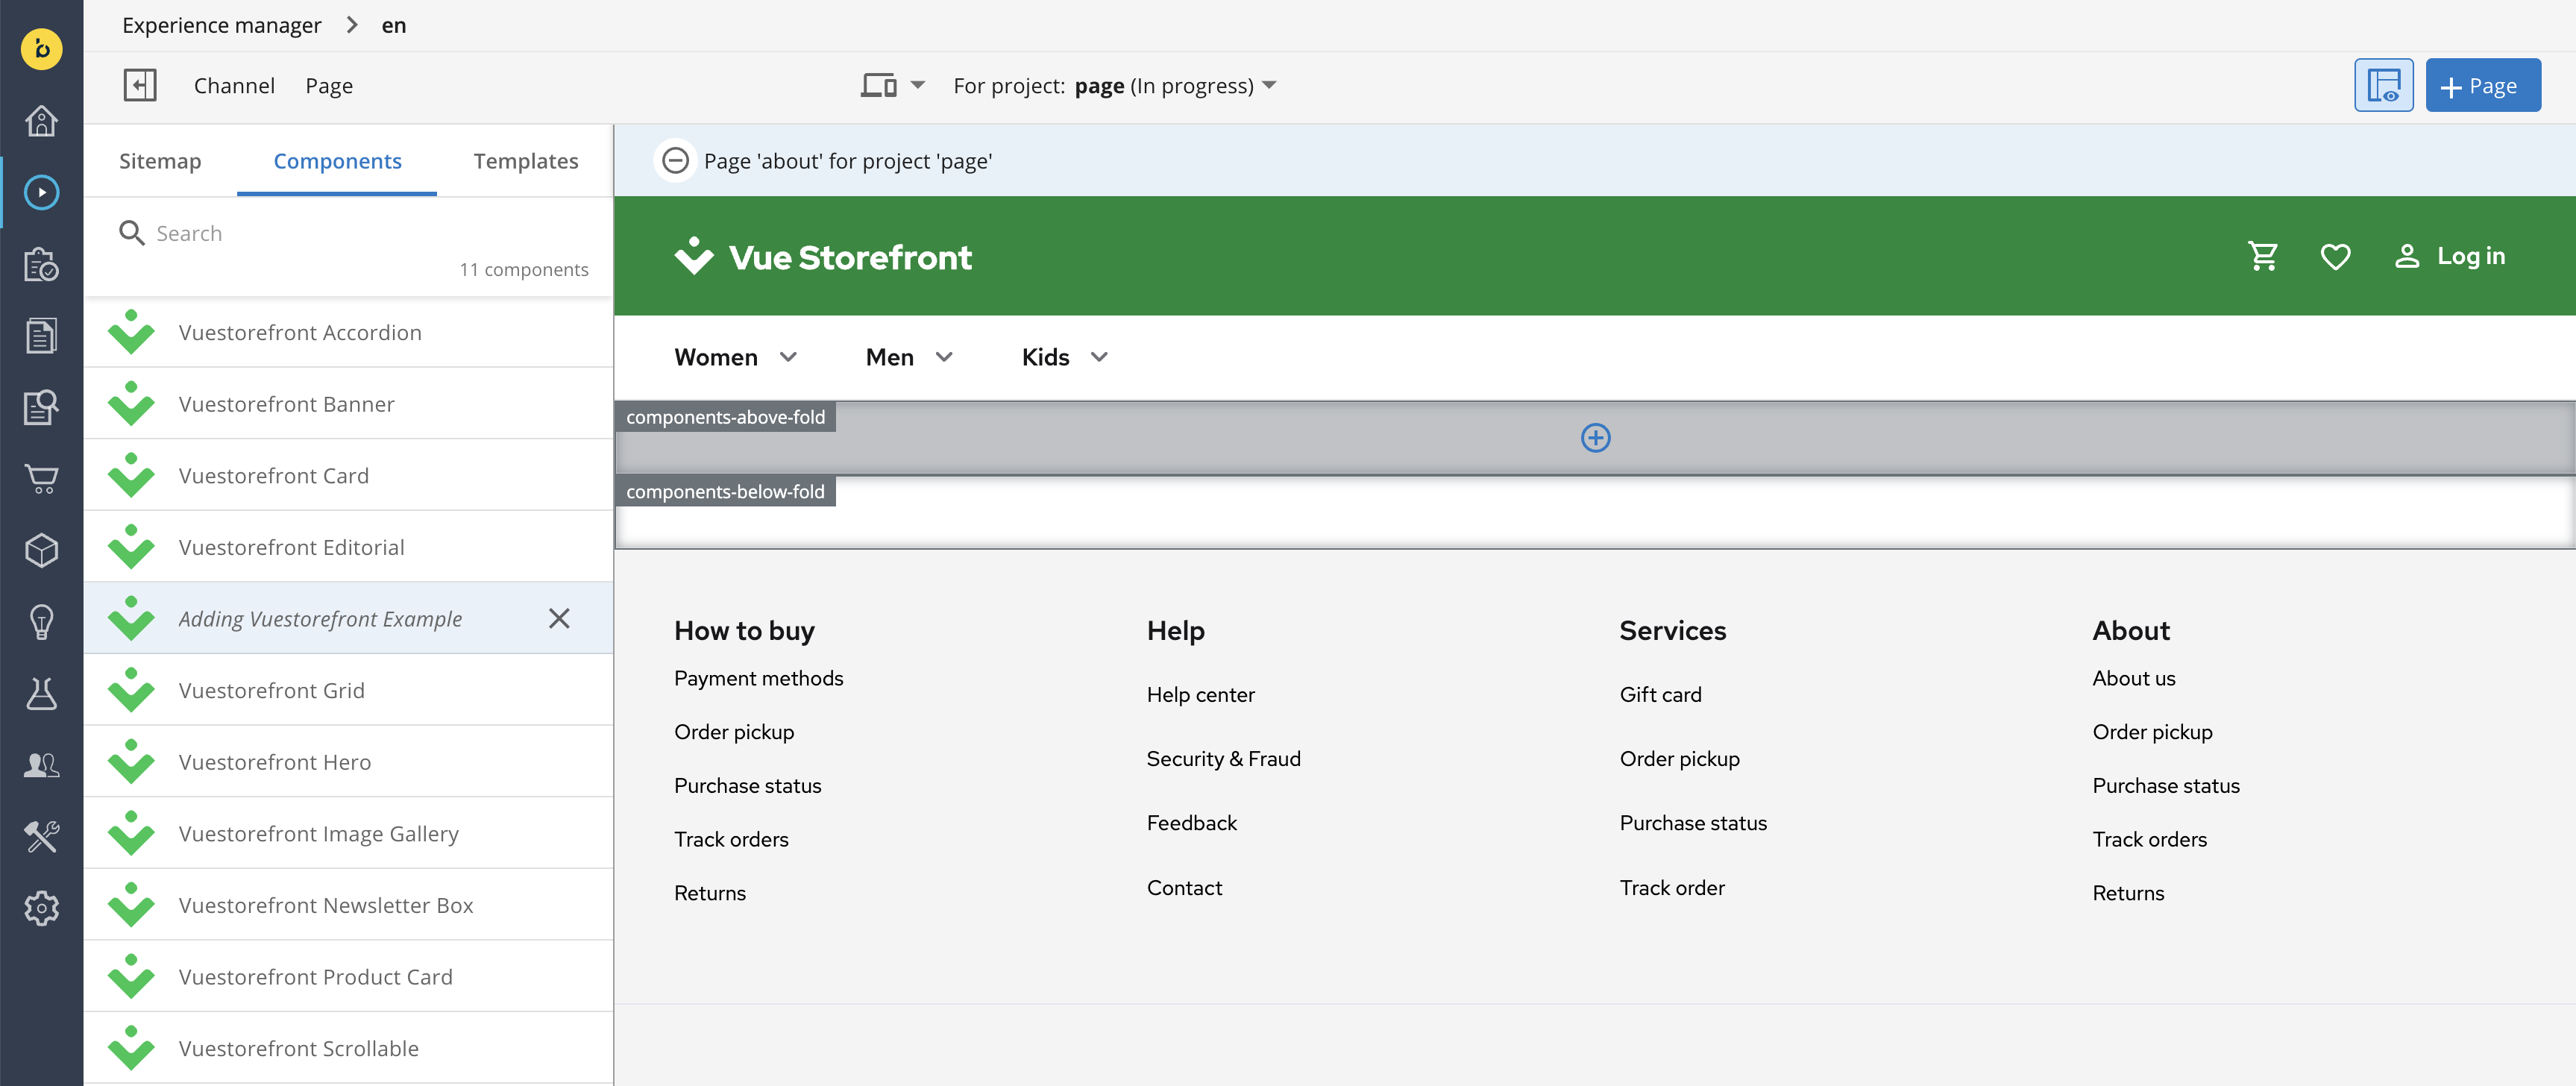
Click the Next button and - right after that - the Create button to save your new page. It should now appear in the preview window, featuring two containers for components: components-above-fold and components-below-fold.

Good to know
In essence, pages in Bloomreach Content are simply documents. You can as well create them in the Documents section of the Content Application. Locate the folder that corresponds to your channel and proceed to create a new document by filling out the form with the values mentioned above. This method serves as a viable alternative when encountering issues with creating pages using the Experience Manager.
Adding components to the page
In the Components sidebar on the left, click the Vuestorefront Example. Hover your mouse over the components-above-fold container and click it once the blue + icon appears.
Once the Vuestorefront Example component is added to the container, hover over the orange magnifying glass icon. A plus button should appear below it. Click it to bring up the form for creating a new document. Give it some arbitrary name and click Next.
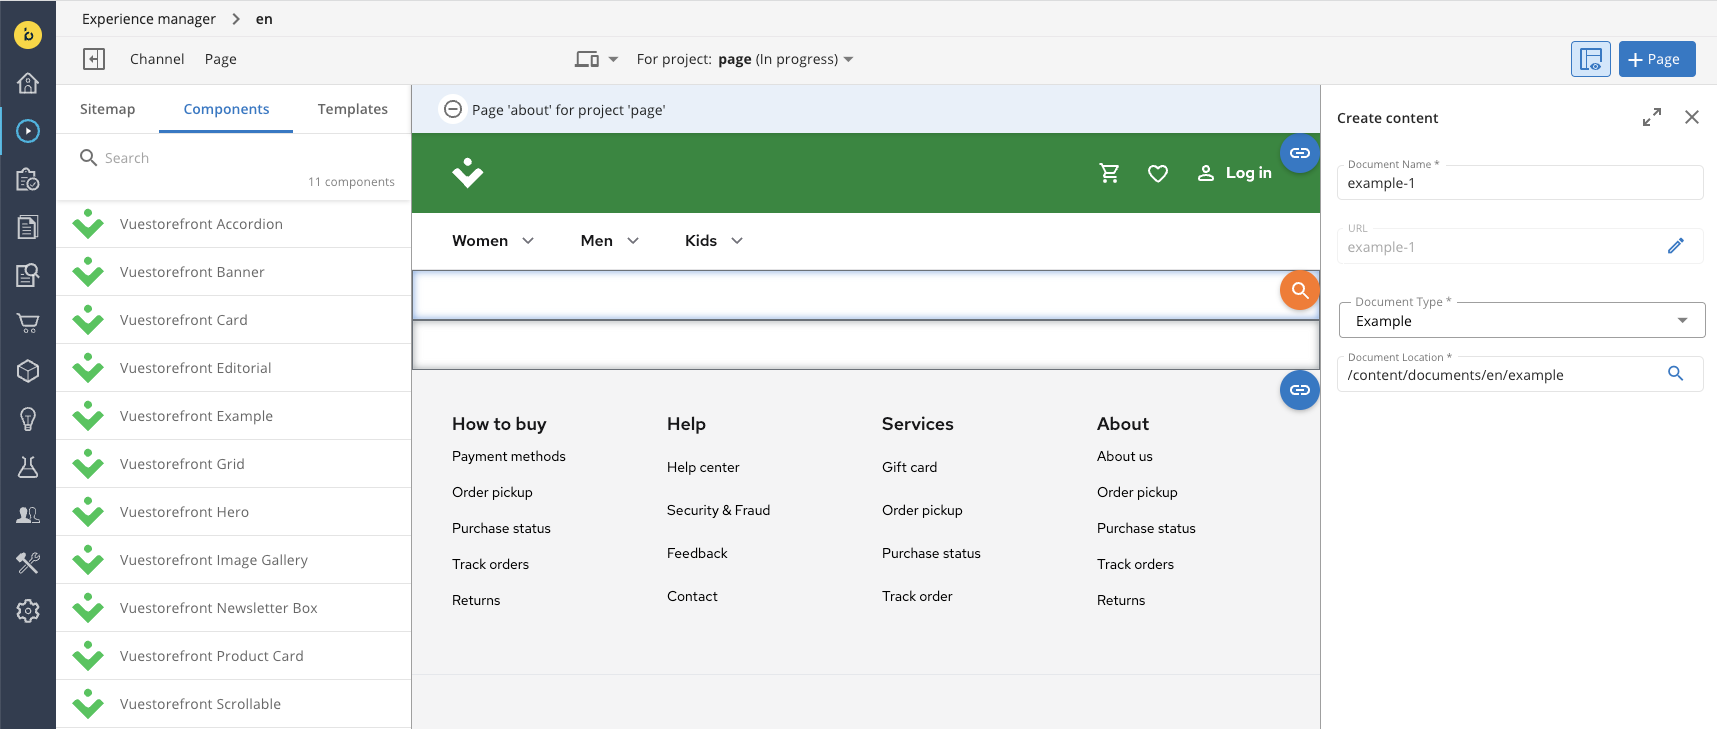
In the next form, add values for simple text fields (title, subtitle) as well as the button field group. For now, you can skip the Styles field. Click Create to save the new document for your component. In the preview window, you should now see your about page featuring a single Example component with a title, subtitle and button.
Congratulations! You've just created your first page. Right now it can be viewed only in the Experience Manager, though. Merge your development project if you want it to be visible "in production" as well.