# Ch 2. Elasticsearch in the VSF context
In this chapter, we are going to cover :
# 0. Introduction
Elasticsearch is the choice of Vue Storefront for its data store as naturally as there must be reasons behind this. By its name, you can deduce Elastic to mean scalable, extendable, distributed and type-agnostic which is great in this big data era while Search implies indexing, filter, Read among CRUD which shows its focus. So far so good, then, what is all this fuss about Elasticsearch?
Elasticsearch is a full-text search and analysis engine based on Apache Lucene by its definition. It employs inverted index which means documents are indexed via all the unique terms occurred and the ability to take advantage of assembling the per-field data structures can explain why Elasticsearch is ultrafast.
The other strong point is, notably, it's inborn distributed. Experience from a single node elasticsearch and multiple clusters of it is almost identical and doing so is painless as it works out of the box. There are virtually tons of points to make for why Elasticsearch is your elected mid-stop between datahouse and storefront. Now let's move on to how it's implemented in Vue Storefront.
Vue Storefront defines itself backend-agnostic PWA e-commerce solution where Vue Storefront is a storefront as the name dictates, and Elasticsearch works as a datastore for catalog and its sibling data such as taxrule, products and so on. When a storefront requests information about a product, then it fetches index of documents about the term queried from Elasticsearch without traversing it to the source web store (be it Magento) so it skips all the heavy loading of the store whose database behind also is not concered which makes customers happy for pleasant experience.
Without much further ado, let's see what's served as an appetizer 😃
# 1. Now ES7 is also supported in VSF
Elasticsearch has been under massive upgrade with interval so intense as only two weeks exist between release of 6.7 and 7.0. Can you feel the heat of the community? While we can enjoy the improvement and enhancement of the Elastic Stack, there is a list to check before smooth upgrade. And it also works just the same way as you need to fix Vue Storefront stack for compatibility with Elasticsearch 7.x.
As Vue Storefront stack is mostly associated with Elasticsearch through Vue Storefront API, you should fix files for Vue Storefront API along with a few callers for it from Vue Storefront. However, most changes take place in core parts of the platform on purpose so your labor will have been minimized for your inner peace. Still, configs and/or migration need fixes where it's necessary. This recipe walks you through how to do it one by one.
# 1. Preparation
- You need to have setup Vue Storefront stack including Vue Storefront API.
- ES7 is supported from Vue Storefront version
1.11and up. You should have it accordingly. - ES7 is supported from Vue Storefront API version
1.11and up. You should have it accordingly too. - ES7 is supported from mage2vuestorefront with branch
feature/es7. You should have it too.
NOTE
How to download the latest 1.11 via git is explained in Protip
# 2. Recipe
- You should fix
docker-compose.nodejs.ymlfile as linked Elasticsearch container should be updated like below :
docker-composefor Elasticsearch 7 is included in1.11. Let's run the docker container for Elasticsearch 7 from Vue Storefront API root path as follows :
docker-compose -f docker-compose.elastic7.yml -f docker-compose.nodejs.yml up
TIP
You can run it in the detach mode with option flag -d as in
docker-compose -f docker-compose.elastic7.yml -f docker-compose.nodejs.yml up -d
- You will see the screen as below :
Starting es7 ...
Starting vuestorefrontapi_redis_1 ...
Starting vuestorefrontapi_redis_1
Starting vuestorefrontapi_redis_1 ... done
Attaching to es7, vuestorefrontapi_redis_1
es7      | OpenJDK 64-Bit Server VM warning: Option UseConcMarkSweepGC was deprecated in version 9.0 and will likely be removed in a future release.
redis_1  | 1:C 23 Dec 18:00:28.554 # oO0OoO0OoO0Oo Redis is starting oO0OoO0OoO0Oo
redis_1  | 1:C 23 Dec 18:00:28.554 # Redis version=4.0.14, bits=64, commit=00000000, modified=0, pid=1, just started
redis_1  | 1:C 23 Dec 18:00:28.554 # Warning: no config file specified, using the default config. In order to specify a config file use redis-server /path/to/redis.conf
redis_1  | 1:M 23 Dec 18:00:28.555 * Running mode=standalone, port=6379.
redis_1  | 1:M 23 Dec 18:00:28.555 # WARNING: The TCP backlog setting of 511 cannot be enforced because /proc/sys/net/core/somaxconn is set to the lower value of 128.
redis_1  | 1:M 23 Dec 18:00:28.555 # Server initialized
redis_1  | 1:M 23 Dec 18:00:28.556 # WARNING overcommit_memory is set to 0! Background save may fail under low memory condition. To fix this issue add 'vm.overcommit_memory = 1' to /etc/sysctl.conf and then reboot or run the command 'sysctl vm.overcommit_memory=1' for this to take effect.
redis_1  | 1:M 23 Dec 18:00:28.556 # WARNING you have Transparent Huge Pages (THP) support enabled in your kernel. This will create latency and memory usage issues with Redis. To fix this issue run the command 'echo never > /sys/kernel/mm/transparent_hugepage/enabled' as root, and add it to your /etc/rc.local in order to retain the setting after a reboot. Redis must be restarted after THP is disabled.
redis_1  | 1:M 23 Dec 18:00:28.556 * DB loaded from disk: 0.000 seconds
redis_1  | 1:M 23 Dec 18:00:28.556 * Ready to accept connections
es7      | {"type": "server", "timestamp": "2019-12-23T18:00:30,129+0000", "level": "INFO", "component": "o.e.e.NodeEnvironment", "cluster.name": "docker-cluster", "node.name": "be374d24f82e",  "message": "using [1] data paths, mounts [[/ (overlay)]], net usable_space [149.4gb], net total_space [250.9gb], types [overlay]"  }
es7      | {"type": "server", "timestamp": "2019-12-23T18:00:30,133+0000", "level": "INFO", "component": "o.e.e.NodeEnvironment", "cluster.name": "docker-cluster", "node.name": "be374d24f82e",  "message": "heap size [494.9mb], compressed ordinary object pointers [true]"  }
es7      | {"type": "server", "timestamp": "2019-12-23T18:00:30,135+0000", "level": "INFO", "component": "o.e.n.Node", "cluster.name": "docker-cluster", "node.name": "be374d24f82e",  "message": "node name [be374d24f82e], node ID [e8P_hrouSEKIWnylBaelVw], cluster name [docker-cluster]"  }
# abridged ...
📼 You may also watch it in bash playback 🎥 (opens new window)
You might notice the script spawns two containers, one of which is for redis while the other is for elasticsearch 7. (kibana container is optional from 1.11)
- Visit
localhost:9200from your browser then it should print likewise as follows :
{
  "name" : "be374d24f82e",
  "cluster_name" : "docker-cluster",
  "cluster_uuid" : "3Gk6anHkQU--5TmenJkdrw",
  "version" : {
    "number" : "7.3.2",
    "build_flavor" : "default",
    "build_type" : "docker",
    "build_hash" : "1c1faf1",
    "build_date" : "2019-09-06T14:40:30.409026Z",
    "build_snapshot" : false,
    "lucene_version" : "8.1.0",
    "minimum_wire_compatibility_version" : "6.8.0",
    "minimum_index_compatibility_version" : "6.0.0-beta1"
  },
  "tagline" : "You Know, for Search"
}
- Fix
local.jsonto update configuration forindexTypesandapiVersionunderelasticsearchas follows :
- Once Elasticsearch 7 instance is up and running, then run the new script which creates index with the proper data types of fields applied.
yarn db7 new
This is because you should newly put mapping for Elasticsearch 7 which only allows one document per single index. more info (opens new window)
The screen spits log as follows :
yarn run v1.21.1
$ node scripts/db7.js new
** Hello! I am going to create NEW ES index
Public index alias does not exists aliases_not_found_exception
Public index alias does not exists aliases_not_found_exception
Public index alias does not exists aliases_not_found_exception
Public index alias does not exists aliases_not_found_exception
Public index alias does not exists aliases_not_found_exception
Public index alias does not exists aliases_not_found_exception
Public index alias does not exists aliases_not_found_exception
Done in 2.27s.
📼 You may also watch it in bash playback 🎥 (opens new window)
Don't worry about aliases_not_found_exception. It simply means it failed to cleanse the orphaned aliases since there was none to delete in the first place.
- Check if the mapping has been created successfully from the terminal against Elasticsearch API :
curl -XGET 'http://localhost:9200/_mapping?pretty=true'
Result should be shown as :
{
  "vue_storefront_catalog_cms_block" : {
    "mappings" : {
      "properties" : {
        "creation_time" : {
          "type" : "date",
          "format" : "yyyy-MM-dd HH:mm:ss||yyyy-MM-dd||epoch_millis"
        },
        "id" : {
          "type" : "long"
        },
        "identifier" : {
          "type" : "keyword"
        },
        "update_time" : {
          "type" : "date",
          "format" : "yyyy-MM-dd HH:mm:ss||yyyy-MM-dd||epoch_millis"
        }
      }
    }
  },
  "vue_storefront_catalog_review" : {
    "mappings" : { }
  },
  "vue_storefront_catalog_taxrule" : {
    "mappings" : {
      "properties" : {
        "id" : {
          "type" : "long"
        },
        "rates" : {
          "properties" : {
            "rate" : {
              "type" : "float"
            }
          }
        }
      }
    }
  },

# ... abridged ...

  "vue_storefront_catalog_category" : {
    "mappings" : {
      "properties" : {
        "created_at" : {
          "type" : "date",
          "format" : "yyyy-MM-dd HH:mm:ss||yyyy-MM-dd||epoch_millis"
        },
        "is_active" : {
          "type" : "boolean"
        },
        "parent_id" : {
          "type" : "integer"
        },
        "position" : {
          "type" : "integer"
        },
        "product_count" : {
          "type" : "integer"
        },
        "slug" : {
          "type" : "keyword"
        },
        "updated_at" : {
          "type" : "date",
          "format" : "yyyy-MM-dd HH:mm:ss||yyyy-MM-dd||epoch_millis"
        },
        "url_key" : {
          "type" : "keyword"
        },
        "url_path" : {
          "type" : "keyword"
        }
      }
    }
  }
}
You can find each index has only its single mapping with convention ${indexName}_${entityType}.
- Next thing is, pumping data from source web store to the newly created ES7 index. Go to mage2vuestorefront directory and fix
apiVersioninsideelasticsearchnode inconfig.js.
With this change in config.js, mage2vuestorefront knows how to deal with your Elasticsearch whose version is higher than 6.
- Now teach the machine your configuration using shell
ENVas following example :
export TIME_TO_EXIT=2000
export MAGENTO_CONSUMER_KEY=lv1unkldzkcex68l3eojut4j66qqho8w
export MAGENTO_CONSUMER_SECRET=zhkuqvweo0bsg14noujqje49x3wht0qr
export MAGENTO_ACCESS_TOKEN=z6ftgc5005212bc6lnszxa7d7ocl8hgc
export MAGENTO_ACCESS_TOKEN_SECRET=h8tikjq9sz7tqm6hyhdfgs96krb6qzyk

export MAGENTO_URL=http://local.magento/rest # Replace the url with your Magento 2 URL
export INDEX_NAME=vue_storefront_catalog # This will be the base name of the index we use
Type them in a shell then your ENV remembers the variables until the session expires.
TIP
If you don't know how to get those credentials, please take a look at data import
- Run your worker to pump it up from source web store to Elasticsearch :
node --harmony cli.js categories --removeNonExistent=true
Screen will show you logs as follows :
2020-01-07T07:21:00.959Z - debug: Elasticsearch module initialized!
info: Winston logging library initialized.
2020-01-07T07:21:00.991Z - info: Connected correctly to server
2020-01-07T07:21:00.992Z - info: TRANSACTION KEY = 1578381660987
debug: Calling API endpoint: GET http://franko.local/rest/V1/categories
debug: Response received.
Dest. cat path =  default-category-2
debug: Calling API endpoint: GET http://franko.local/rest/V1/categories/2
debug: Response received.
Dest. cat path =  default-category-2
2020-01-07T07:21:02.029Z - debug: Storing extended category data to cache under: vue_storefront_catalog_cat_2
debug: Calling API endpoint: GET http://franko.local/rest/V1/categories/4
debug: Calling API endpoint: GET http://franko.local/rest/V1/categories/5
debug: Calling API endpoint: GET http://franko.local/rest/V1/categories/3
debug: Calling API endpoint: GET http://franko.local/rest/V1/categories/7
debug: Calling API endpoint: GET http://franko.local/rest/V1/categories/8
debug: Calling API endpoint: GET http://franko.local/rest/V1/categories/9
debug: Calling API endpoint: GET http://franko.local/rest/V1/categories/6
debug: Response received.
Dest. cat path =  boy/pants/pants-4
2020-01-07T07:21:03.427Z - info: Subcategory data extended for 2, children object 4
debug: Response received.
Dest. cat path =  girl/pants/pants-9
2020-01-07T07:21:03.431Z - info: Subcategory data extended for 2, children object 9

# abridged ...
📼 You may also watch it in bash playback 🎥 (opens new window)
Confirm you are on the correct path with following command :
curl -XGET "http://localhost:9200/vue_storefront_catalog_category/_search?pretty=true"
Response should be like below :
# ... abridged
      {
        "_index" : "vue_storefront_catalog_category",
        "_type" : "_doc",
        "_id" : "8",
        "_score" : 1.0,
        "_source" : {
          "id" : 8,
          "parent_id" : 6,
          "name" : "Outer",
          "is_active" : true,
          "position" : 2,
          "level" : 3,
          "product_count" : 1,
          "children_data" : [ ],
          "children" : "",
          "created_at" : "2019-12-24 17:05:27",
          "updated_at" : "2019-12-24 17:05:27",
          "path" : "1/2/6/8",
          "available_sort_by" : [ ],
          "include_in_menu" : true,
          "display_mode" : "PRODUCTS",
          "is_anchor" : "1",
          "children_count" : "0",
          "custom_use_parent_settings" : "0",
          "custom_apply_to_products" : "0",
          "url_key" : "outer-8",
          "url_path" : "girl/outer/outer-8",
          "slug" : "outer-8",
          "tsk" : 1578381660987
        }
      },
      {
        "_index" : "vue_storefront_catalog_category",
        "_type" : "_doc",
        "_id" : "9",
        "_score" : 1.0,
        "_source" : {
          "id" : 9,
          "parent_id" : 6,
          "name" : "Pants",
          "is_active" : true,
          "position" : 3,
          "level" : 3,
          "product_count" : 0,
          "children_data" : [ ],
          "children" : "",
          "created_at" : "2019-12-24 17:05:52",
          "updated_at" : "2019-12-24 17:05:52",
          "path" : "1/2/6/9",
          "available_sort_by" : [ ],
          "include_in_menu" : true,
          "display_mode" : "PRODUCTS",
          "is_anchor" : "1",
          "children_count" : "0",
          "custom_use_parent_settings" : "0",
          "custom_apply_to_products" : "0",
          "url_key" : "pants-9",
          "url_path" : "girl/pants/pants-9",
          "slug" : "pants-9",
          "tsk" : 1578381660987
        }
      },
      {
        "_index" : "vue_storefront_catalog_category",
        "_type" : "_doc",
        "_id" : "7",
        "_score" : 1.0,
        "_source" : {
          "id" : 7,
          "parent_id" : 6,
          "name" : "Skirt",
          "is_active" : true,
          "position" : 1,
          "level" : 3,
          "product_count" : 1,
          "children_data" : [ ],
          "children" : "",
          "created_at" : "2019-12-24 17:05:13",
          "updated_at" : "2019-12-24 17:26:22",
          "path" : "1/2/6/7",
          "available_sort_by" : [ ],
          "include_in_menu" : true,
          "display_mode" : "PRODUCTS",
          "is_anchor" : "1",
          "children_count" : "0",
          "custom_use_parent_settings" : "0",
          "custom_apply_to_products" : "0",
          "url_key" : "skirt-7",
          "url_path" : "girl/skirt/skirt-7",
          "slug" : "skirt-7",
          "tsk" : 1578381660987
        }
      }
    ]
  }
}
- Repeat this process until you are done importing entities with all the indices you mapped to Elasticsearch before such as products, attributes, taxrules and more as follows :
node --harmony cli.js productcategories
node --harmony cli.js attributes --removeNonExistent=true
node --harmony cli.js taxrule --removeNonExistent=true
node --harmony cli.js products --removeNonExistent=true --partitions=1
node --harmony cli.js reviews
node --harmony cli.js blocks
node --harmony cli.js pages
NOTE
API endpoints for reviews, blocks and pages from Magento are not available out of the box. You should install additional modules for them on your own. review (opens new window), cms (opens new window)
Now you are ready to launch your Vue Storefront shop powered by Elasticsearch 7.
- Run the following to launch your shop at Vue Storefront root path.
docker-compose up
You are all good to go!
# 3. Peep into the kitchen (what happens internally)
Elasticsearch has been through intensive updates ceaselessly. Mostly, it's gradual changes with backward compatibility so it won't have a big impact even if you upgrade one to another. This time, however, upgrade to 7.x has a few breaking changes, one notably of which is, multiple _type is not allowed for an index.
Fixing breaks for Elasticsearch 7.x has been successfully included in Vue Storefront 1.11 upgrade.
First thing you need to do is, download the upgrade with git. Upgraded version of containers are described in docker-compose files so what it contains inside is well encapsulated that you don't have to be concerned of how it works internally unless you want to tweak customization more than the default.
Next, you should newly create each mapping for Elasticsearch index as per the type. Then pumping your data into Elasticsearch using mage2vuestorefront.
If things go as planned so far so good, your above-7-Elasticsearch should serve as performant search engine for data store with enhanced indexing ability.
# 4. Chef's secret (protip)
# Secret 1. How to upgrade to 1.11 technically? foolproof approach.
There are 3 repositories that should be upgraded for 1.11.
CHECK
Please make sure your git space is clean and has nothing to conflict with upcoming merge.
First off, go to Vue Storefront API folder and type the following :
git fetch
git merge v1.11.0
NOTE
Please note v1.11.0 is the tag that denotes the final commit for the version at the moment.
Next, go to Vue Storefront folder and type the following :
git fetch
git merge v1.11.0
Finally, go to mage2vuestorefront folder and run the following commands :
git fetch
git merge origin/feature/es7
Now you are all set 😃
# 2. Extend Elasticsearch entities for VSF
Online shops normally have certain types of models and scenarios in common. (Because shops are shops in the end! What do you expect from shops? 😉) They are well known to the community and most of e-commerce software already implemented them into their frameworks as expected which is good for your new business. Those are represented as entities, namely, Catalog, Products, Attributes, Tax rule and more. Since Vue Storefront functions as the gorgeous gateway to those e-commerce backend, it also needs to mirror those entities as smooth as possible.
The large part of main entities are already implemented in VSF core as expected but you might still need to add or remove additional entities as you want it to fulfill your mission. This recipe will give you an idea of how to do it.
# 1. Preparation
- You need to have setup Vue Storefront stack including Vue Storefront API.
- There are two ways to deal with Search Adapter for Entity Type ; One is with API (Recipe A), The other is with GraphQL (opens new window) (Recipe B)
- You should have custom entity module in Magento 2 to import custom entities. Download example module here (opens new window)
- You should have imported data for the new entity for the sake of testing. 2-0. Appetizer guides you in how to do it.
TIP
The default Search Adapter is API.
In order to change which Search Adapter should be in labor, please take a look at here Chef's secret 1. how to switch search adapters
# 2-0 Appetizer
- Assume you need an entity type for Offline Stores of your online shop for example. So you can store the information of your stores in data store, which is Elasticsearch in this case, read the data whenever you need it like you want to display offline stores while on checkout for customer to pick up if they live nearby.
NOTE
There are two ways to import your data into data store. One for using mage2vuestorefront (opens new window) which runs NodeJS scripts to do the job while the other for using magento2-vsbridge-indexer (opens new window) that is a native Magento 2 module for the job.
In this recipe, we choose the former. But don't worry we will also look into the latter in the Chef's secret 2.
- Go to mage2vuestorefront root folder and do the following :
cd src/adapters/magento
This folder is where the connector adapter should be.
- Create the following file named, say,
offline_stores.jsas follows :
'use strict';

let AbstractMagentoAdapter = require('./abstract');
const CacheKeys = require('./cache_keys');
const util = require('util');

class OfflineStoresAdapter extends AbstractMagentoAdapter {

 getEntityType() {
   return 'offline_stores';
 }

 getName() {
   return 'adapters/magento/OfflineStoresAdapter';
 }

 getSourceData(context) {
   return this.api.offlineStores.list();
 }

 /**  Regarding Magento 2 api docs and reality we do have an exception here that items aren't listed straight in the response but under "items" key */
 prepareItems(items) {
   if(!items)
     return items;

   if (items.total_count)
     this.total_count = items.total_count;

   if(items.items)
     items = items.items; // this is an exceptional behavior for Magento 2 api  for attributes

   return items;
 }

 isFederated() {
   return false;
 }

 preProcessItem(item) {
   return new Promise((done, reject) => {
     if (item) {

     }

     return done(item);
   });
 }

 /**
  * We're transforming the data structure of item to be compliant with Smile.fr Elastic Search Suite
  * @param {object} item  document to be updated in elastic search
  */
 normalizeDocumentFormat(item) {
   return item;
 }
}

module.exports = OfflineStoresAdapter;
This is the basic skeleton for an adapter. We will look at this later.
- Now, move on to
magento2-rest-clientlibrary :
cd magento2-rest-client/lib
- Here we need to create a library file
offline_stores.jsfor the adapter with the following :
var util = require('util');

module.exports = function (restClient) {
   var module = {};

   module.list = function (searchCriteria) {
       var endpointUrl = util.format('/offline-stores');
       return restClient.get(endpointUrl);
   }

   return module;
}
This library file only deals with GET API to get a list of offline stores from Magento 2.
NOTE
var endpointUrl = util.format('/offline-stores');
This line is particularly important, since '/offline-stores' is where the API url endpoint is determined. It should match the API url endpoint of Magento 2 side.
- Now we need to include this library in
index.js:
cd ..
vi index.js
Then fix it as follows :
// ... abridged

var blocks = require('./lib/blocks');
var pages = require('./lib/pages');
var offlineStores = require('./lib/offline_stores');

const MAGENTO_API_VERSION = 'V1';

module.exports.Magento2Client = function (options) {
   var instance = {};

   options.version = MAGENTO_API_VERSION;

   var client = RestClient(options);

   instance.offlineStores = offlineStores(client);
   instance.attributes = attributes(client);
   instance.categories = categories(client);

// abridged ...
- Time for creating a command to import the data, go to the folder where
cli.jslocates :
cd ../../.. # ./src
Open cli.js and add a method and a command as follows :
// ... abridged

const reindexOfflineStores = (adapterName) => {
 return new Promise((resolve, reject) => {
   let adapter = factory.getAdapter(adapterName, 'offline_stores');
   adapter.run({
     done_callback: () => {
       logger.info('Task done! Exiting in 30s...');
       setTimeout(process.exit, TIME_TO_EXIT); // let ES commit all changes made
       resolve();
     }
   });
 });
}

program
 .command('offlinestores')
 .option('--adapter <adapter>', 'name of the adapter', 'magento')
 .option('--removeNonExistent <removeNonExistent>', 'remove non existent products', false)
 .action(async (cmd) => {
   await reindexOfflineStores(cmd.adapter, cmd.removeNonExistent);
 });

program
 .command('attributes')
 .option('--adapter <adapter>', 'name of the adapter', 'magento')
// abridged...
- All is good, now run the command to import offline stores information!
node cli.js offlinestores
You will see a screen like below :
2020-03-10T09:22:30.359Z - debug: Elasticsearch module initialized!
info: Winston logging library initialized.
2020-03-10T09:22:30.796Z - info: Connected correctly to server
2020-03-10T09:22:30.796Z - info: TRANSACTION KEY = 1583832150786
debug: Calling API endpoint: GET http://localhost/rest//V1/offline-stores
debug: Response received.
2020-03-10T09:22:32.130Z - info: Importing 0 of 3 - 1 with tsk = 1583832150786
2020-03-10T09:22:32.131Z - info: Tasks count = 2
2020-03-10T09:22:32.139Z - info: Importing 1 of 3 - 2 with tsk = 1583832150786
2020-03-10T09:22:32.139Z - info: Tasks count = 1
2020-03-10T09:22:32.139Z - info: Importing 2 of 3 - 3 with tsk = 1583832150786
2020-03-10T09:22:32.140Z - info: Tasks count = 0
2020-03-10T09:22:32.140Z - info: No tasks to process. All records processed!
2020-03-10T09:22:32.140Z - info: Task done! Exiting in 30s...
NOTE
You should tell the machine the environment variable like this before running the command :
export MAGENTO_URL=http://localhost/rest
Please replace the url if you use different one for the Magento 2 instance.
- Let's confirm the result and wrap this up!
curl localhost:8080/api/catalog/vue_storefront_catalog/offline_stores/_search
The response should be something as follows unless there is something wrong :
{
  "took": 2,
  "timed_out": false,
  "_shards": {
    "total": 1,
    "successful": 1,
    "skipped": 0,
    "failed": 0
  },
  "hits": {
    "total": {
      "value": 3,
      "relation": "eq"
    },
    "max_score": 1,
    "hits": [
      {
        "_index": "vue_storefront_catalog_offline_stores",
        "_type": "_doc",
        "_id": "2",
        "_score": 1,
        "_source": {
          "id": "2",
          "name": "Wrocaw",
          "address": "Ulica Romana Dmowskiego 17, 50-203 Wrocaw, Poland",
          "phone": "+48 577 032 500",
          "is_active": "1",
          "tsk": 1583832150786
        }
      },
      {
        "_index": "vue_storefront_catalog_offline_stores",
        "_type": "_doc",
        "_id": "3",
        "_score": 1,
        "_source": {
          "id": "3",
          "name": "Seoul",
          "address": "Seoul GangNam Street 1st 12",
          "phone": "+82 10 2364 3330",
          "is_active": "1",
          "tsk": 1583832150786
        }
      },
      {
        "_index": "vue_storefront_catalog_offline_stores",
        "_type": "_doc",
        "_id": "1",
        "_score": 1,
        "_source": {
          "id": "1",
          "name": "Warszawa",
          "address": "Koci pw. w. Michaa Archanioa",
          "phone": "+48 22 845 46 04",
          "is_active": "1",
          "tsk": 1583832150786
        }
      }
    ]
  }
}
You have successfully imported your custom entities!
# 2-1. Recipe A (with API)
- First off, we need to create an
apifolder undersrc/search/adapter/as follows :
cd src/search/adapter
mkdir api
- Copy
searchAdapterfile fromcorefolder :
cp ../../../core/lib/search/adapter/api/searchAdapter.ts api/
NOTE
The reason you should copy the whole searchAdapter.ts file is, in doing so your adapter also includes default entities from core into custom file because your custom entities can't be added incrementally to the default. Here's why (opens new window)
- Write a function to handle adding a custom entity type in
searchAdapter.tsyou just copied and initialize it in the constructor of the same class as follows :
// ... abridged

export class SearchAdapter {
 public entities: any

 public constructor () {
   this.entities = []
   this.initBaseTypes()
   this.initCustomTypes()
 }

 //... abridged ...

 public initCustomTypes() {
   this.registerEntityType('offline_stores', {
     queryProcessor: (query) => {
       // function that can modify the query each time before it's being executed
       return query
     },
     resultProcessor: (resp, start, size) => {
       return this.handleResult(resp, 'offline_stores', start, size)
     }
   })
 }
}
Here you can see registerEntityType method add offline_stores entity type as an example.
If you want to add more entities, you can clone the example as many times as you want and change entity name to your need.
TIP
The method initCustomTypes above is arbitrarily named out of the blue, so you can actually have any other name for the method.
Now you are all set to use custom entity you just created. The next step lets you have a simple idea how to confirm it. (optional)
- Go to
src/modules/instant-checkout/componentsand openInstantCheckout.vue. Fix it as follows :
// ... abridged
import { currentStoreView } from '@vue-storefront/core/lib/multistore'
import { registerModule } from '@vue-storefront/core/lib/modules'
import { OrderModule } from '@vue-storefront/core/modules/order'
import { quickSearchByQuery } from '@vue-storefront/core/lib/search'; // Import the method to fetch data from ES
const storeView = currentStoreView()
// ... abridged
methods: {
async showPayment () { // the method should be done with async/await
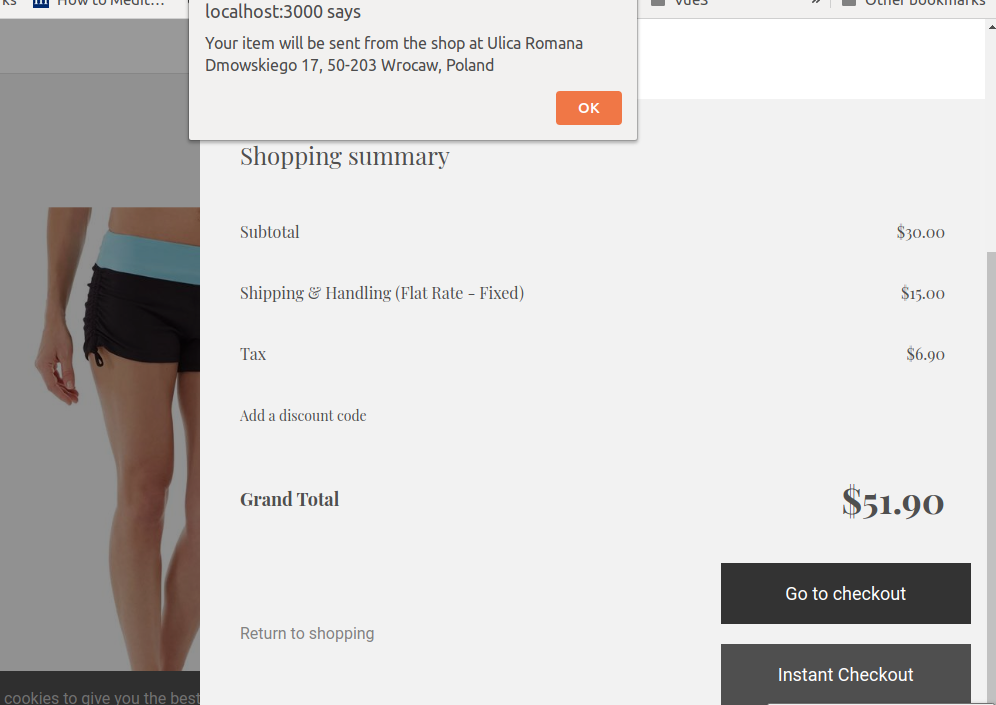
let offlineStores = await quickSearchByQuery({ entityType: 'offline_stores' });
alert("Your item will be sent from the shop at " + offlineStores.items[0].address);
const payment = new PaymentRequest(this.paymentMethods, this.paymentDetails , this.paymentOptions)
// abridged ...
Now go to your online shop, put an item to cart and open it, click Instant Checkout button, then you will see the screen like below :
# 3. Peep into the kitchen (what happens internally)
In this recipe, we iterated a whole journey of building custom entities on your online shop (it was Magento 2 for this time) for whatever reason to deal with various information for enhancing your customer experience.
First, we downloaded a Magento 2 module for Offline Stores entity. It contains basic information for each offline store.
Second, as an appetizer, we had to import data from shop using mage2vuestorefront. We followed how core team did it with its sibling open source.
Third, main dish, we extended core adapters in src folder so we are safe for future updates 😃.
It was actually very easy! you just need to registerEntityType for your custom entity! We also looked at how to implement it in real example though it was simplified version, you better follow vuex best practice.
We also have a variety of main dish, by giving you an option to go with GraphQL. This approach took us a little more to tweak with, but believe me, GraphQL has pretty good advantage (opens new window) over its competitors.
Now we can extend our shop as good as it gets to handle more versatile information on your shop. Congratulation!
# 4. Chef's secret (protip)
# Secret 1. How to switch Search Adapters
If you want to use GraphQL adapter for your search, you need to change the value for server.api node to graphql in ./config/local.json in Vue Storefront as follows :
{
  "server": {
    "host": "localhost",
    "port": 3000,
    "protocol": "http",
    "api": "graphql",
    "devServiceWorker": false,
    "useHtmlMinifier": true,
    "htmlMinifierOptions": {