# Project setup
This document will guide you through the process of setting up a commercetools project that you'll then be able to connect to Vue Storefront. This guide intentionally only describes the basic working configuration to get you up and running as fast as possible. To learn more about commercetools, see the commercetools documentation (opens new window).
# Prerequisites
This guide assumes you already have access to the commercetools Merchant Center (opens new window).
# Create a new commercetools project
Log into your commercetools account and create a new project following the Create a project (opens new window) guide from commercetools. One project can provide data for multiple selling channels, but you can have more than one project with different settings and catalogs if you need it.
By default, you can only connect the Vue Storefront project to one commercetools project. However, you can modify the middleware.config.js and nuxt.config.js files to export different configurations based on environment variables. This way, you can use one Vue Storefront project for multiple commercetools projects.
# Configuring commercetools project
Once you already have a project in commercetools, you can start configuring it in the Project settings page of the Merchant Center.
More information
For more information about the project set up in commercetools, see the Project settings (opens new window) page in commercetools documentation.

# Configuring International tab
When you open the Project settings page from the menu, you will see a few tabs at the top. The first step in configuring a commercetools store is to configure options in the International tab.
Start by selecting currencies available in your store:

Then, select supported languages:

Next, select the available countries:

Finally, set zones. They are helpful when few countries share the same delivery costs. You need to configure at least one shipping zone to be able to set up shipping methods later.

# Configuring Taxes tab
In the Taxes tab on the Project settings page, you can configure tax rates for the countries configured in the International tab.

# Configuring Shipping methods tab
You can add a shipping method in the Shipping methods tab on the Project settings page. First, select if the price will be fixed or tiered. Then, enter specific methods for each zone and currency.

# Adding a new category
Categories allow you to organize the products in groups and make them easy to find by the customer.
More information
For more information about categories, see the Modeling Categories (opens new window) page in commercetools documentation.
To create a category, go to the Add category page from the sidebar menu.

Enter the name and category order.
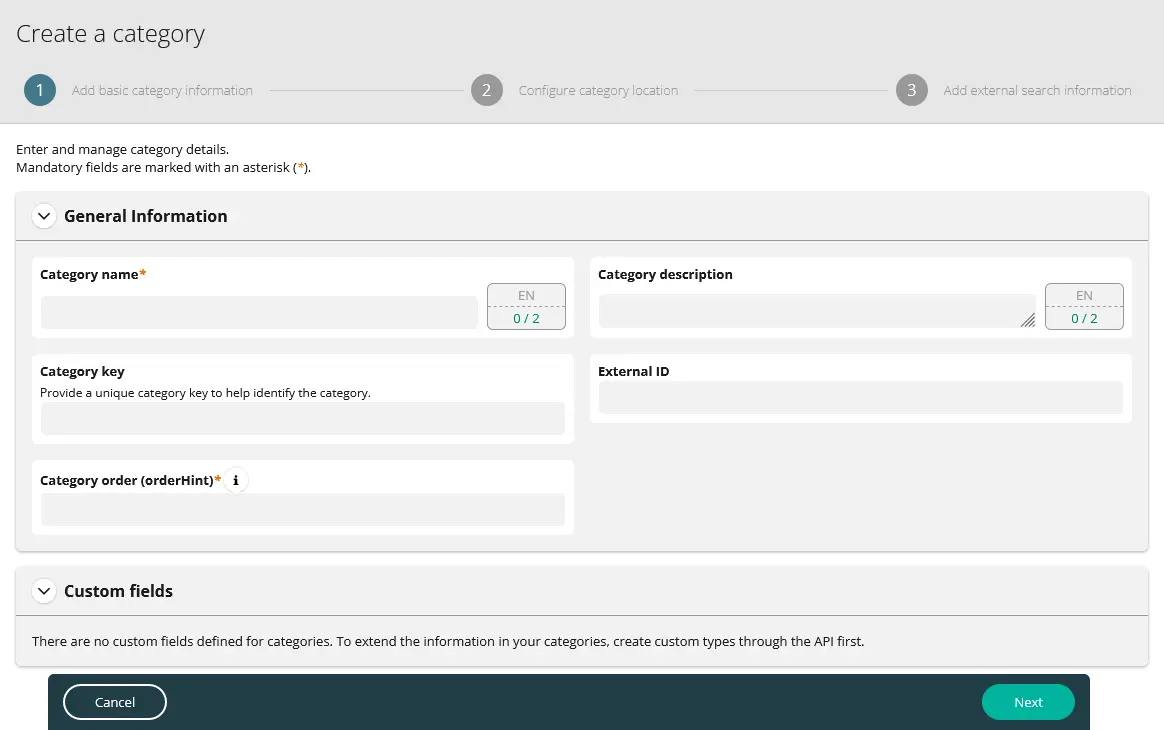
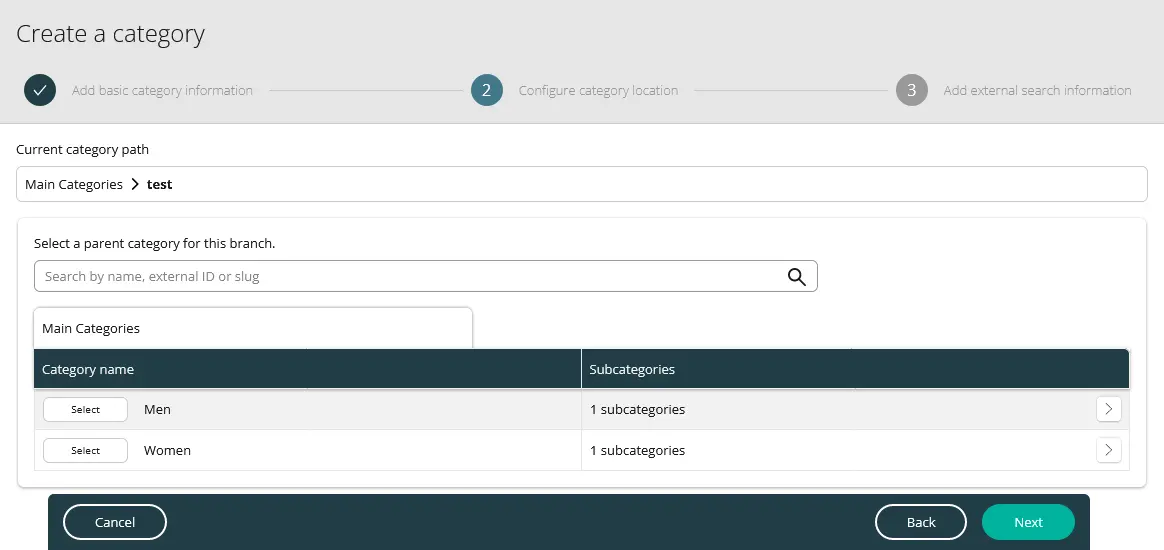
If applicable, select the parent category to which this category belongs.
Enter the category slug. It will be part of the URL for this category.
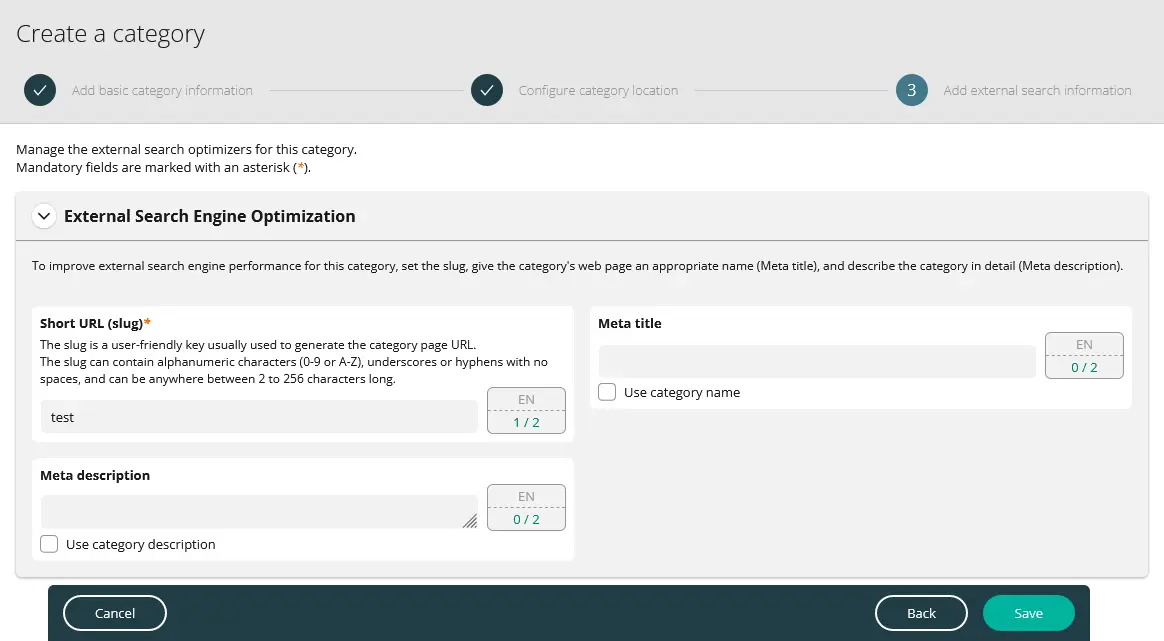
WARNING
You have to create a category structure with at least two levels to display the category page in the Vue Storefront project correctly.
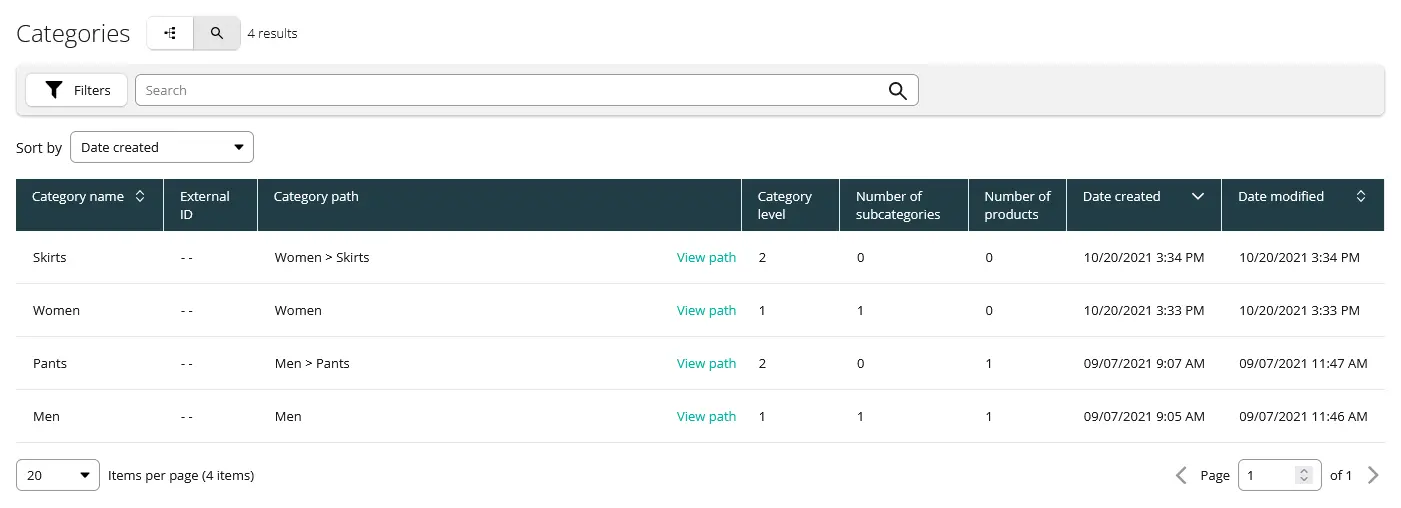
You can see your categories in the categories search menu:
# Adding a new product type
Before we can add any new product in commercetools, we need at least one product type. Product types are templates with specific attributes for products of the same type.
More information
For more information about product types, see the Modeling Product Types and Attributes (opens new window) page in commercetools documentation.
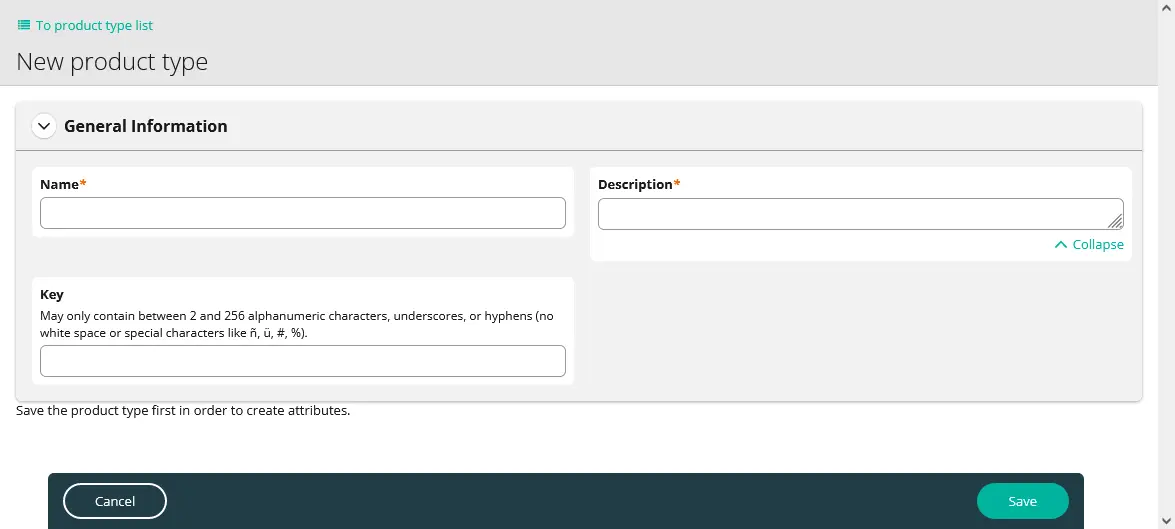
To create a product type, go to the Product types page from the sidebar menu and click the Add product type button.

Enter name and description and click the Save button. Without saving, you won't be able to add attributes in the next step.
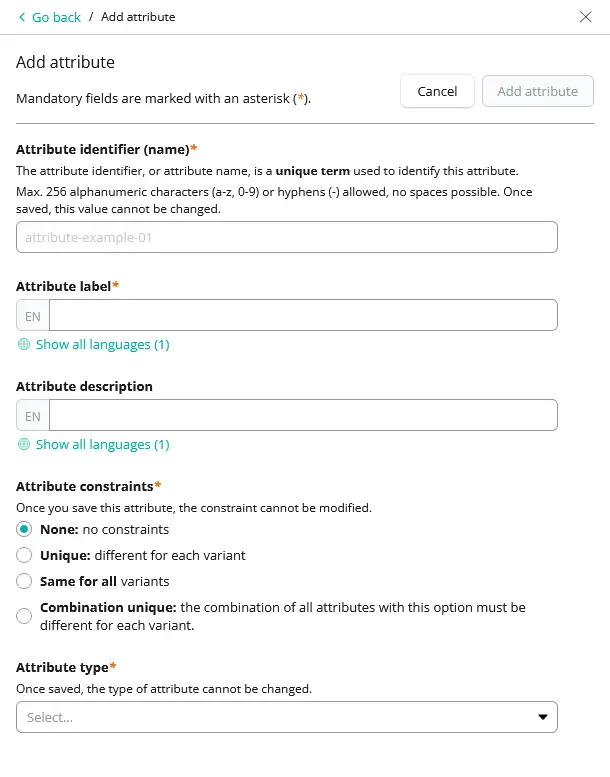
Click the Add an attribute button and enter the name, label, constraints, and type fields.
# Adding a new product
After creating at least one product type, you can add a new product.
More information
For more information about products, see the Modeling Products (opens new window) page in the commercetools documentation.
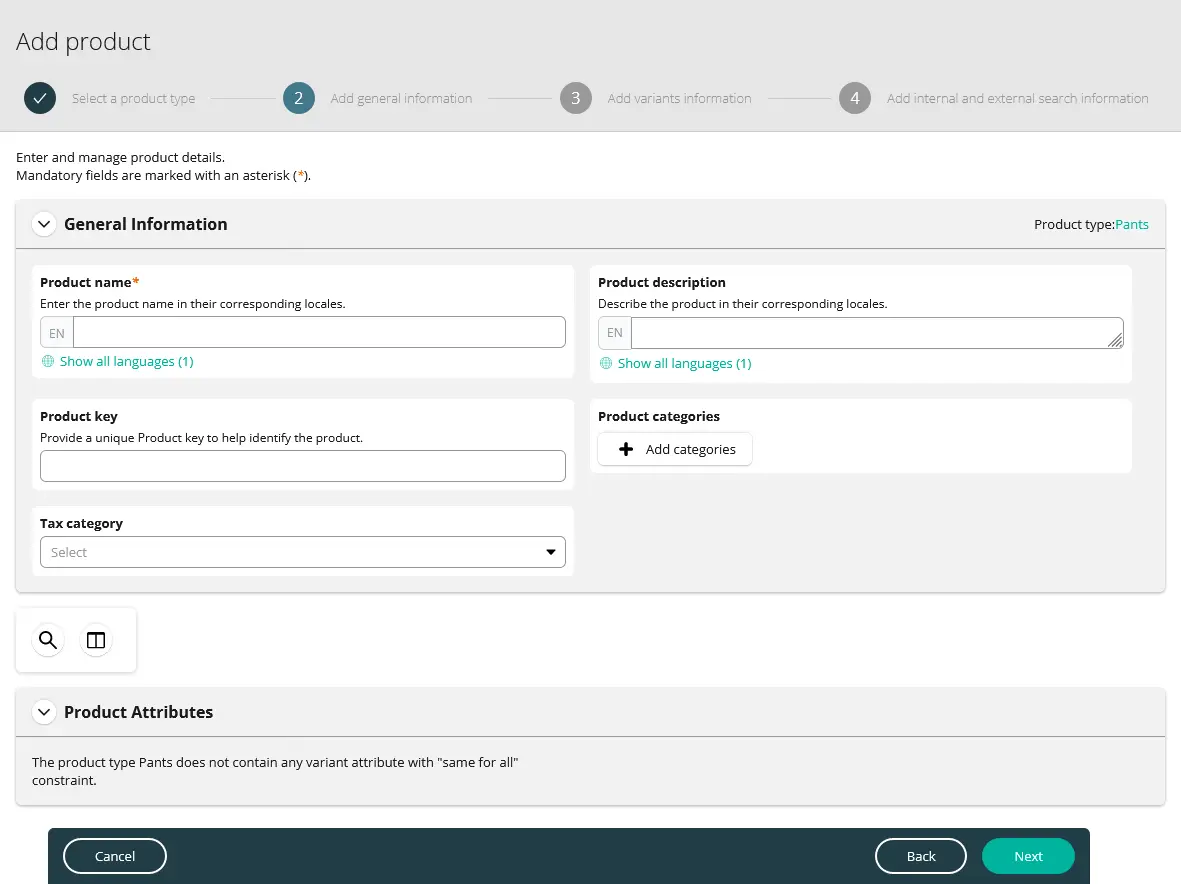
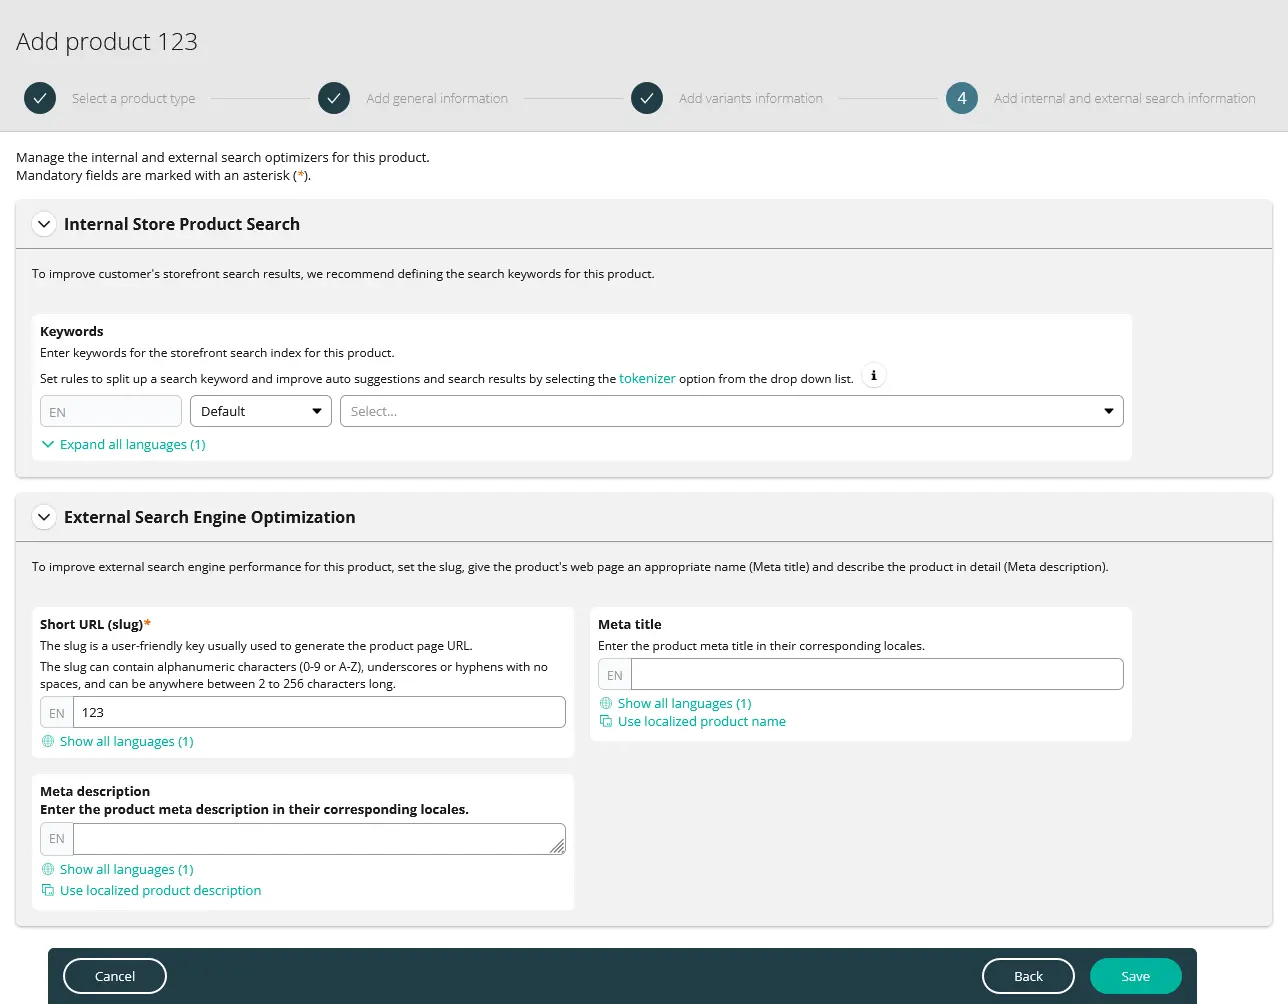
To create a product, go to the Add product page.

Start by selecting the product type.

Type the name and assign the tax category.
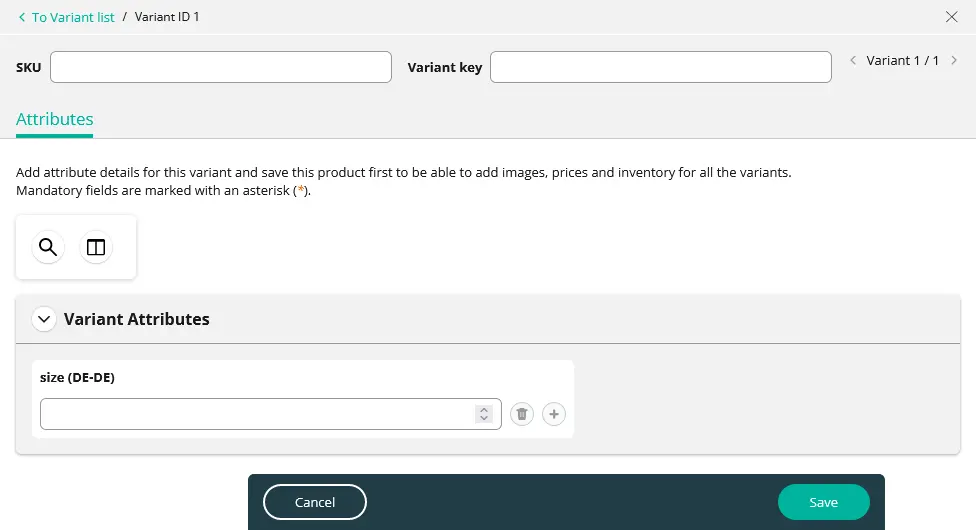
Click the Add variant button and add at least one variant of the product with attributes and SKU number.
Enter a slug, keywords, and metadata to optimize searching. Once you are finished, click the Save button.
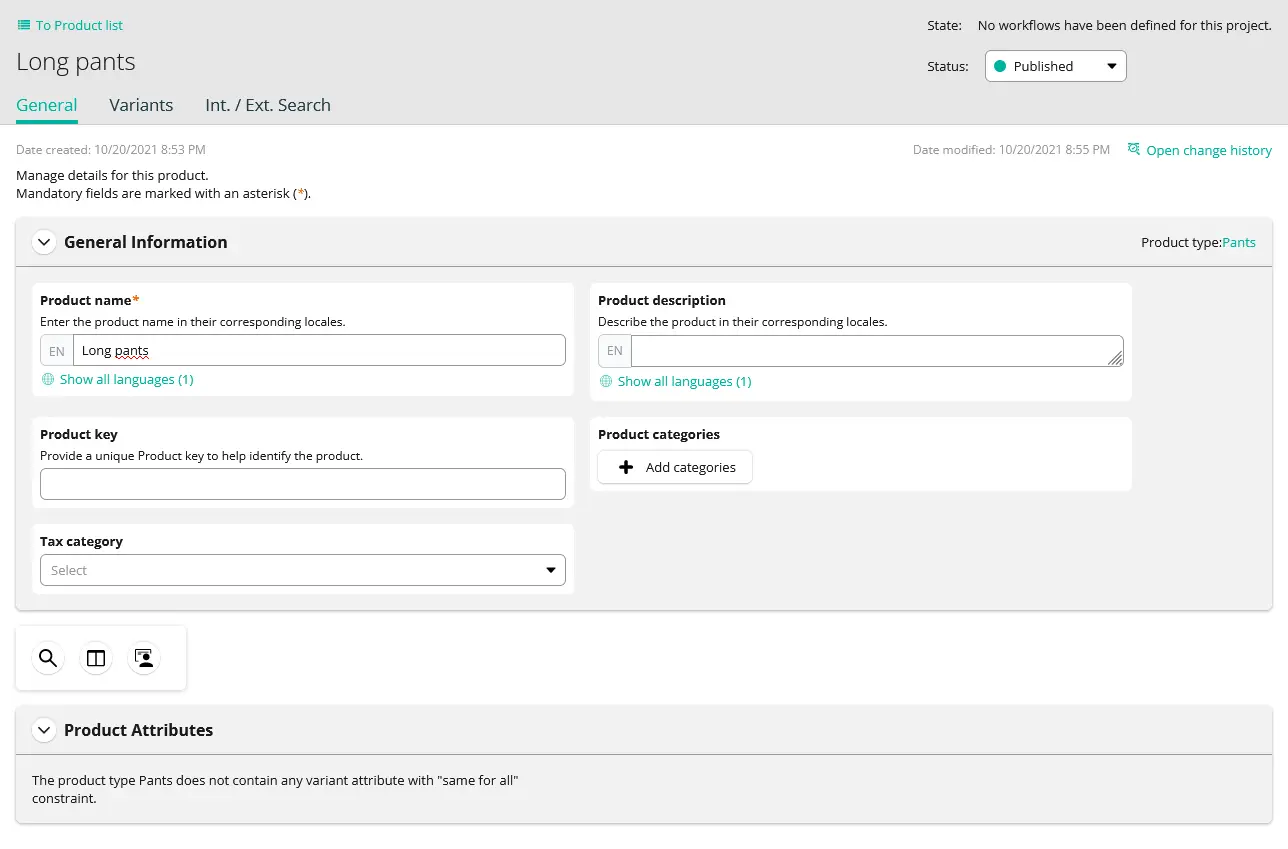
Once the product is saved and you are redirected to the product summary page, change product status to Published in the top right part of the product screen.
# Creating an API client
With commercetools project already configured, we can connect it to our Vue Storefront application. To do so, we need to generate two separate API clients.
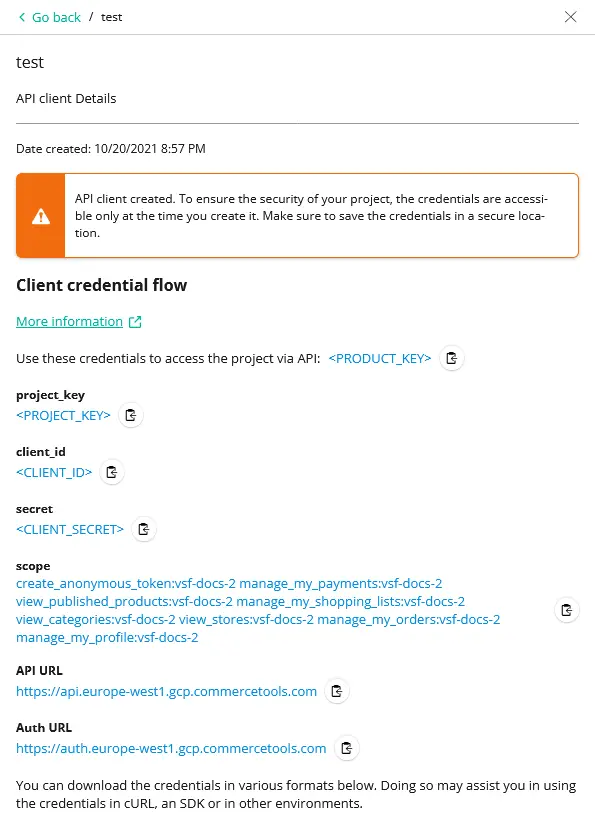
Save the credentials for later!
After creating an API client, download or write down its credentials because they will be displayed only once. You will need them later to connect your project to Vue Storefront. To see which credentials you'll need, refer to the Configuration section.
Go to the Developer settings page.

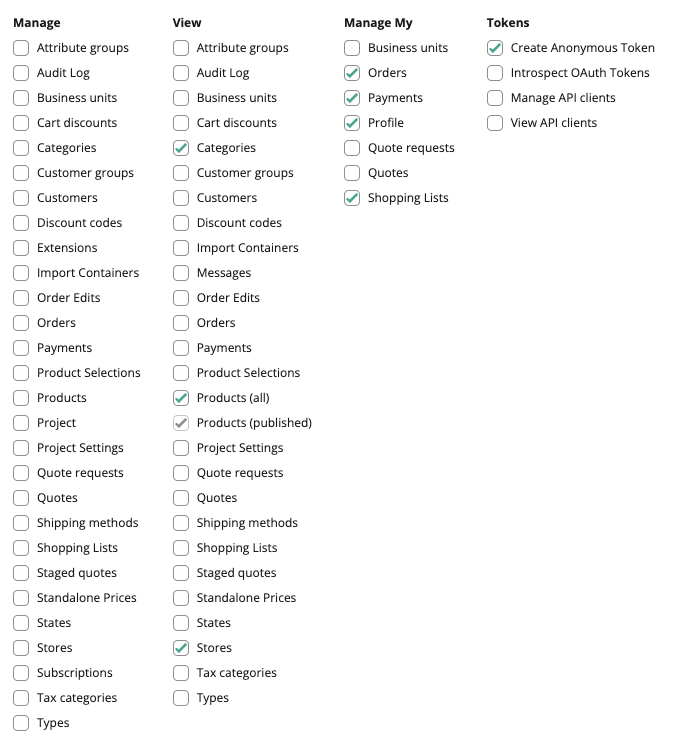
Click the Create new API client button and enter the name for the first API client. The application will use this API client to generate an access token for guests and customers visiting your shop. Then in the Scopes section, select the Mobile & single-page application client option from the list of available templates. Additionally, select the Stores checkbox in the View column. The image below shows which permissions you should select.
More information
For more information about scopes, see the Scopes (opens new window) page in the commercetools documentation.
When you click on the Create API client button, you will see all the credentials. They are only displayed once, so you need to store them securely. You can also download them in the format you need.
Congratulations! You've just created your first commercetools API client. You will use it later in the api section of your commercetools configuration in Vue Storefront.
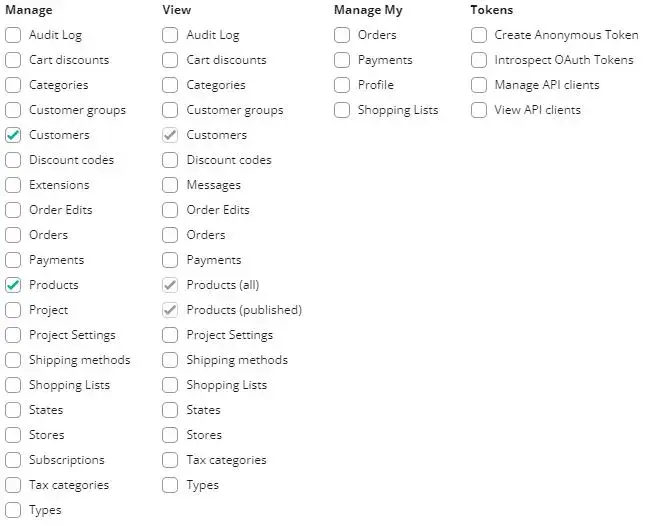
Repeat the same process to create a second API client. This time, select only the Customers and Products permissions from the Manage column. Vue Storefront application will use this API client to generate access tokens used by the Server Middleware to perform operations requiring higher permissions than regular guests and customers should have.
Now you should have credentials for two separate commercetools API clients ready. Let's proceed to the Configuration section and use them!